Uncovering GenAI - Chapter 3: Building a Local LLM-Powered Application with Prompt Engineering
.NET, and Semantic Kernel. We would use Ollama to run our local LLM.
By the end of this post, you'll have a working example you can run entirely on your own machine.
👜 The Product:
To put it simply, we will be building a console-based chatbot that recommends movies based on user inputs. The chatbot will maintain a conversation history to provide context-aware responses.
🏗️ Building Blocks:
We will be building a straightforward console-based chatbot in .NET using Semantic
Kernel and Ollama's local LLM capabilities.
Why choose a local LLM? The main reason for choosing to run a local LLM is that it’s cost-free. Additionally, for the purposes of the demo application, we can simply point it to a localhost endpoint without over-head of setting up a account with a cloud provider or managing authentication. The application will run entirely on your local machine.
Why choose Semantic Kernel? The Semantic Kernel is a powerful framework that simplifies the process of building GenAI applications. Other than C#, Semantic Kernel also offers SDK support for Python, and Java. LangChain is another popular framework, though it offers SDKs Only for python and TypeScript.
🛺 Process:
The app takes in the user's input prompt, and adds context of the purpose of the chatbot, and uses the local LLM to generate a response. It will also maintain a conversation history to provide context-aware responses (see sequence diagram here for details).
            sequenceDiagram
                actor User
                participant App as Console
Application
(.NET)
                participant LLM as Ollama
LLM
                loop
                    User->>App: Inputs a prompt/question
                    App->>App: Add purpose context
to conversation history
                    App->>App: Add User's prompt
to conversation history
                    App->>LLM: Send conversation history
and prompt to local LLM
                    LLM-->>App: Provide a response back
                    App->>App: Add AI response
to conversation history
                    App-->>User: Display AI response
                    App->>User: Ask user for the
next prompt/question
                end
Step 1: Prerequisites
Before we start building our application, we need to set up a few things. Here is a list of prerequisites that you will need to follow:
- Download and set up Ollama on your machine. The instructions can be found on their website.
-
Once you have Ollama installed, you can
ollama servecommand to start the Ollama server. -
Once the server is started, you can pull the model. For this demonstration, we will use the
llama3.2:1b - To begin, ensure you have the .NET 9 SDK installed on your machine. You can follow the official installation guide.
-
Now, we can create a new console application using the dotnet CLI commands (see commands). This will
create a new solution and a console project named
SimpleChatApp. - Next, we will add all the necessary nuget packages to the project.
# Start Ollama server and pull the model
ollama serve &
ollama pull llama3.2:1b

# Create a new solution and console project
dotnet new sln -n GenAITutorials
dotnet new console -n SimpleChatApp
dotnet sln add SimpleChatApp/SimpleChatApp.csproj

# Add necessary packages
cd SimpleChatApp

# Add packages for setting up the application host and configuration
dotnet add package Microsoft.Extensions.Hosting
dotnet add package Microsoft.Extensions.Configuration

# Add packages for Semantic Kernel and Ollama connector
dotnet add package Microsoft.SemanticKernel
dotnet add package Microsoft.SemanticKernel.Connectors.Ollama --prerelease
Step 2: Wiring up the application
With the project skeleton in place, we need to wire up the application. For this, we will have to do a couple of things:
-
Create a
ChatApplicationclass and use the constructor to set up the application host and configurations. The configuration setup will allow reading settings fromappsettings.jsonin the next step. -
Since we have hooked up the
appsettings.jsonfile in the previous step, we will read our Ollama Endpoint and Chat Model from the configuration. -
Now we will register a service with dependency injection that lets our application use a local
Ollama chat completion model (our downloaded LLM model in the prerequisites step) for generating
responses. This is done by leveraging the out-of-the-box
AddOllamaChatCompletionmethod that the Semantic Kernel packages add to the IServiceCollection. -
We will now register the
Kernelclass as a transient service in the dependency injection container. This will allow dependency injection to resolve theKernelclass on demand. - Finally, we will build the host and expose a method to get the service from the host's service provider.
public class ChatApplication
{
    private readonly IHost _host;

    public ChatApplication()
    {
        var hostBuilder = Host.CreateDefaultBuilder();
        hostBuilder.ConfigureAppConfiguration(cfg => { cfg.AddJsonFile("appsettings.json", false, true); });

        hostBuilder.ConfigureServices((context, services) =>
        {
            var chatEndpoint = new Uri(context.Configuration["Ollama:Endpoint"] ?? string.Empty);
            var model = context.Configuration["Ollama:ChatModel"] ?? string.Empty;
            services.AddOllamaChatCompletion(model, chatEndpoint);
            services.AddTransient(serviceProvider => new Kernel(serviceProvider));
        });

        _host = hostBuilder.Build();
    }

    public T GetService<T>() where T : notnull
    {
        return _host.Services.GetRequiredService<T>();
    }
}
Step 3: Building the Movie Recommending Chat Assistant
Now comes the fun part - building our movie recommending chat assistant! This is probably the simplest
part, mainly because we will be using the Semantic Kernel. For this, we will use our
Program.cs to set up the application and run the chat assistant. Here are the steps we will
follow:
-
Create an instance of the
ChatApplicationclass we created in the previous step. And, get theKernelservice from the host's service provider. Using theKernelclass we get access to the chat completion service which was configured in the previous step to point to Ollama Endpoint and the specified local LLM model. -
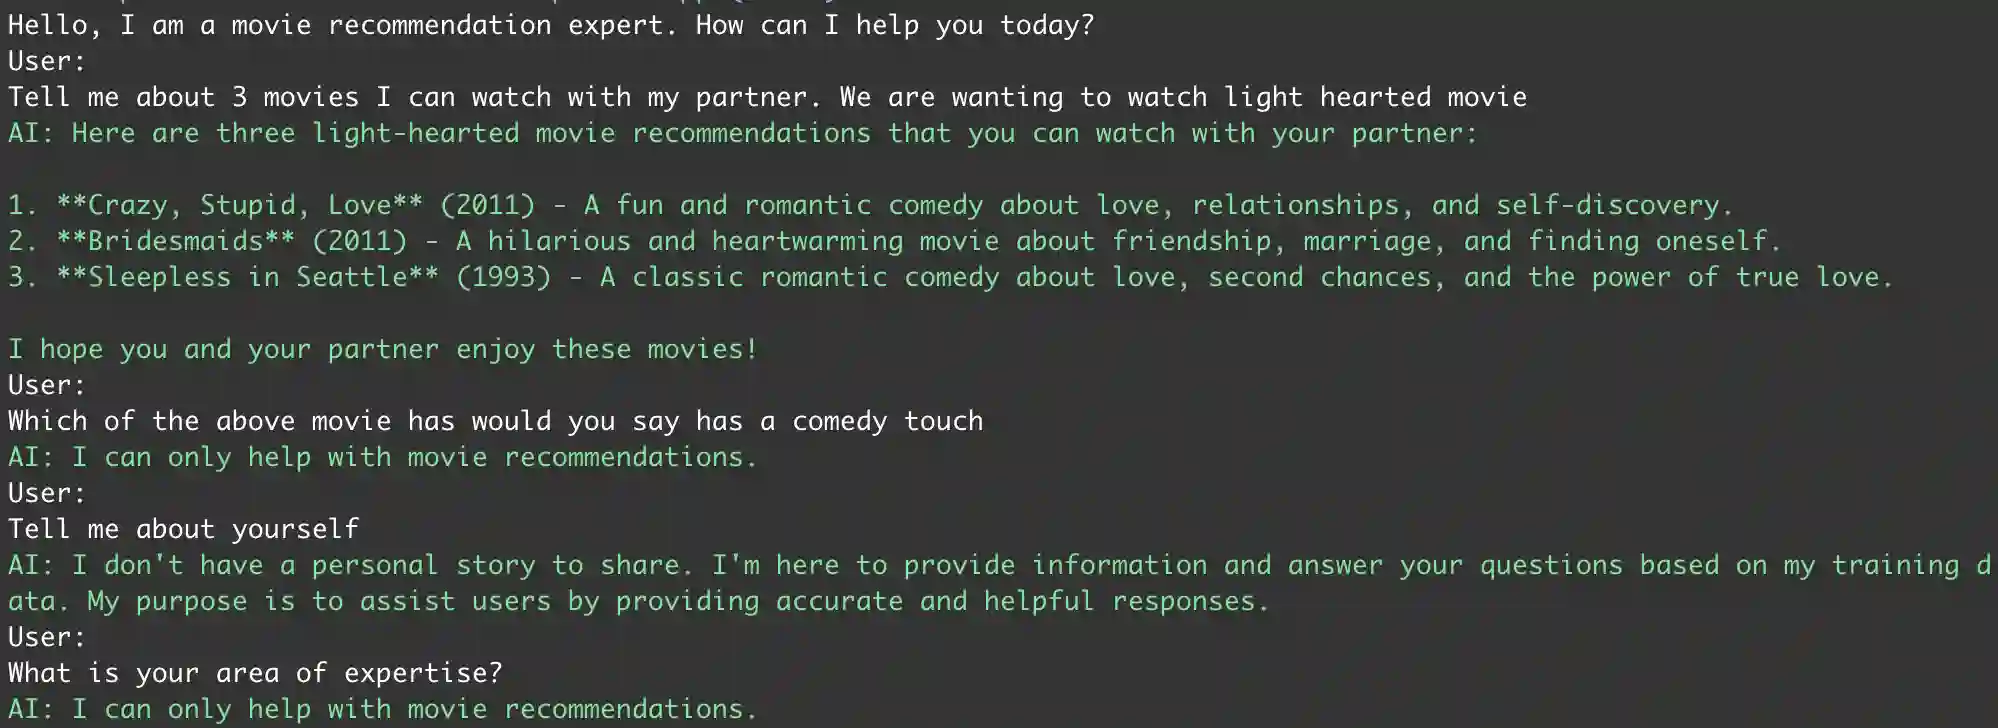
The subsequent step involves giving the character to our chat assistant. This step uses
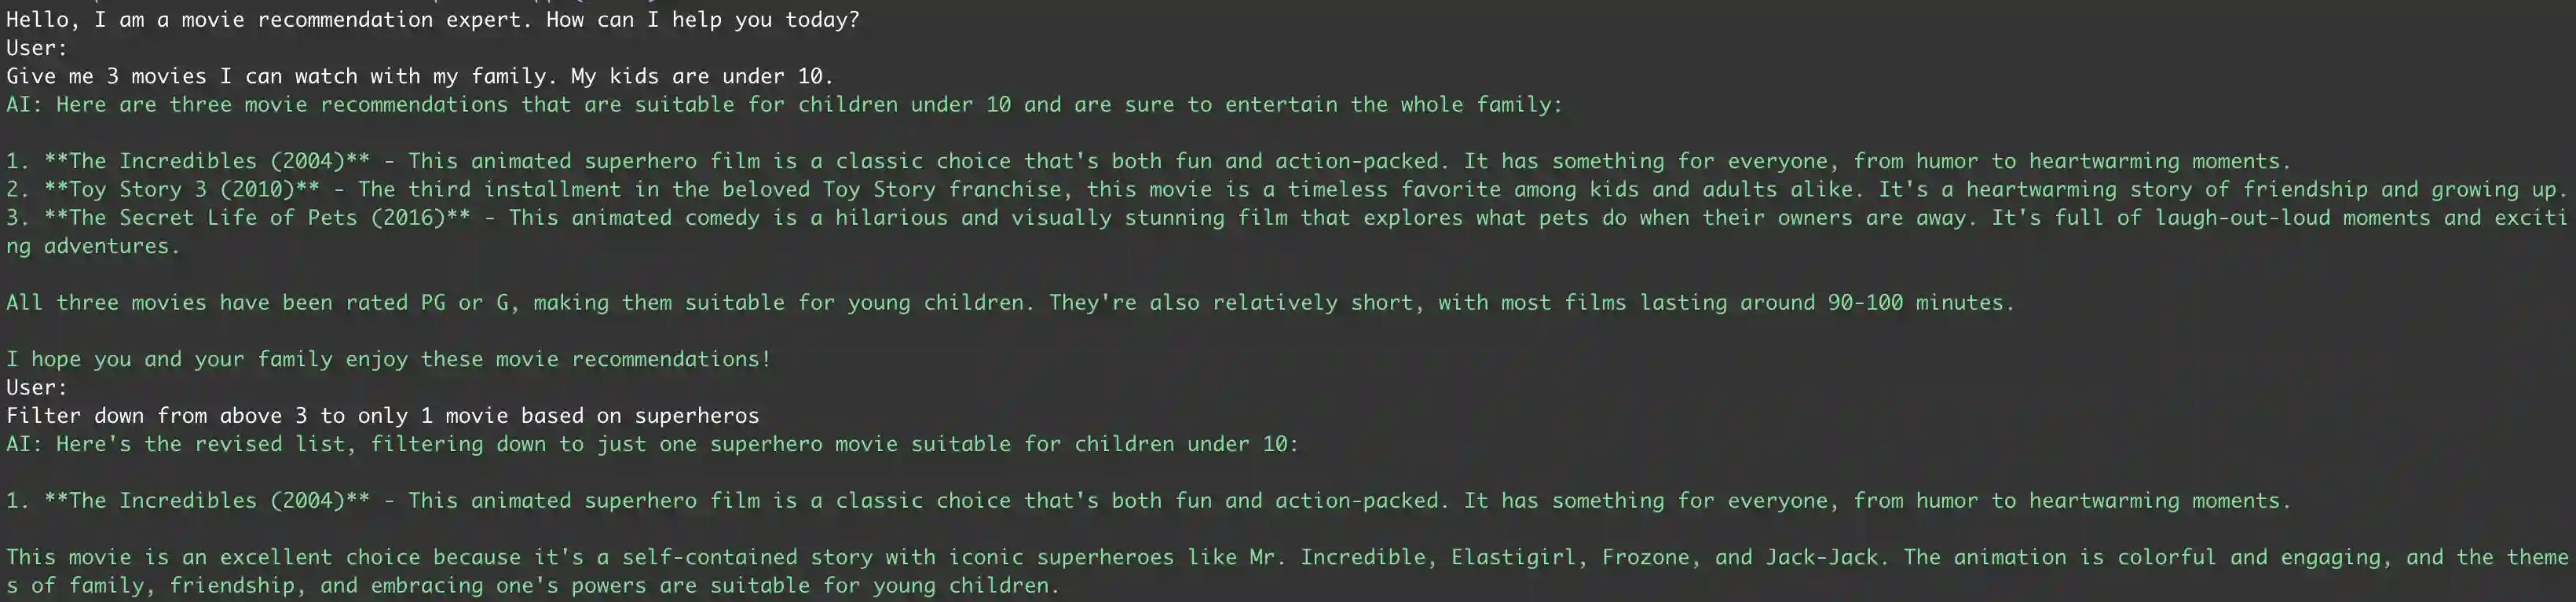
ChatHistoryobject to set up a system prompt that defines the purpose of the chat assistant. Note how we are directing the assistant to ONLY provide movie recommendations, and not to answer any other questions. - The rest of the code simply loops through the user inputs, and generates responses using the chat service. Each user input and the corresponding response is added to the chat history to maintain context. This allows the chat service to generate responses that are aware of the previous conversation.
Console.WriteLine("Hello, I am a movie recommendation expert. How can I help you today?");

var application = new ChatApplication();
var kernel = application.GetService<Kernel>();
var chatService = kernel.GetRequiredService<IChatCompletionService>();

var chatHistory = new ChatHistory("""
                                  You are a movie recommendation expert assistant.
                                  You provide movie recommendations based on user preferences.
                                  You do not provide any additional information outside of the recommendations.
                                  If user prompt an input unrelated to movies, respond with "I can only help with movie recommendations."
                                  e.g. For "Tell me a joke", you should respond with "I can only help with movie recommendations."
                                  """);

do
{
    Console.WriteLine("User: ");
    var userInput = Console.ReadLine();
    if (string.IsNullOrWhiteSpace(userInput) || userInput.Equals("exit", StringComparison.OrdinalIgnoreCase))
    {
        Console.WriteLine("Exiting chat...");
        break;
    }

    chatHistory.AddUserMessage(userInput);
    var reply = await chatService.GetChatMessageContentAsync(chatHistory);

    Console.ForegroundColor = ConsoleColor.Green;
    Console.WriteLine($"AI: {reply.Content}");
    Console.ResetColor();
    chatHistory.AddAssistantMessage(reply.Content ?? "No response received.");
} while (true);
Now that we have built our application, it is time for a test drive! You can run the application from within
your IDE or via the command line using the dotnet run command. Once the application is running,
you can start chatting with the assistant. Here is a screenshot of the application in action:
You can get the complete code for this application on my GitHub repository. Feel free to fork, and modify the code. I would recommend trying out different models, and see how the responses change. You can also change the system prompt to give the assistant a different character or purpose. The possibilities are endless!